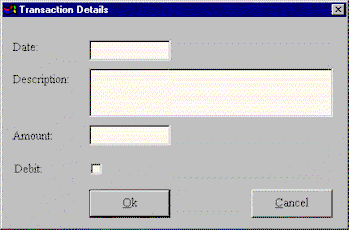
Following basically the same procedure as before, use the View Composer to create a view for the PersonalAccountTransactionDialog presenter. This time, however, you are creating a dialog, so you should close the shell view that the View Composer initially creates for you and then drag a dialog view across from the toolbox.
Tip: you'll find a suitable dialog view under the Dialog class, labelled "OK-Cancel dialog".
You'll want to end up with something like this:
Before you start, confirm the connection points to the presenter. In PersonalAccountTransactionDialog we have:
| Sub-presenter type | Connection name | Model aspect |
|---|---|---|
| DatePresenter | 'date' | #date |
| NumberPresenter | 'amount' | #amount |
| TextPresenter | 'description' | #description |
| BooleanPresenter | 'isDebit' | #isDebit |
Tip: you'll find that the DatePresenter class has two possible views that can be used to display dates. In the above we have chosen the Text view so that the date will be displayed and edited in a conventional text entry field. You might also like to try using a Date picker which is the Windows control specifically designed for the graphical display and entry of date information. The interesting thing here, is that you can choose either view (or maybe go back later and choose a different one) without having to change any of your Smalltalk (presenter) code. This again demonstates the real flexibility of MVP.
Save the created view as a resource called 'DefaultView' in the PersonalAccountTransactionDialog class.
We can now test the combination of a PersonalAccountShell and a PersonalAccountTransactionDialog working in tandem. In a workspace evaluate:
PersonalAccountShell show.
Enter some details for an account and then press the New button to create a new transaction on it. You should see the dialog that you've just created appear, editing a default instance of PersonalAccountTransaction. Fill in the details for the transaction and press OK to confirm the changes. An entry for the transaction will appear in the transaction list in the account details view. You can continue to add more transactions and watch the account balance diminish as each is entered.
Click here to move on to the next section or here to go back to the previous section.